
Sign into a LaunchDarkly account
You'll need a LaunchDarkly account and Project in which to create flags for this tutorial. However, you may already have one, especially if you're taking a LaunchDarkly workshop.
If you're in a guided workshop
If you're taking this tutorial at a guided workshop such as LaunchDarkly Space Camp. you should have already received a unique link that will sign you into a specially-created LaunchDarkly account. Each participant in the workshop has an empty LaunchDarkly Project ready to use.
Click that special link to sign into this LaunchDarkly account.
You should see a page that looks like this:
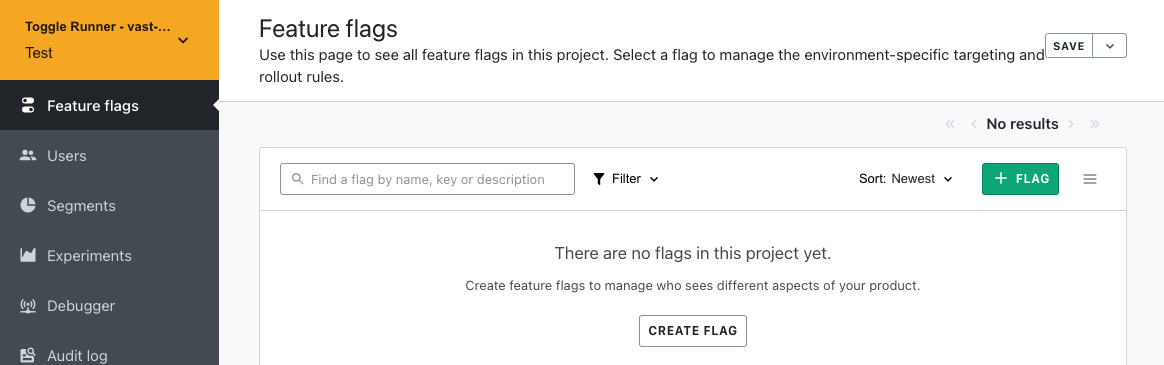
This is your LaunchDarkly Project, in which you can create your own flags. Note that the Project will be deleted some time after the end of the workshop.
Once you've signed into your Project, you can skip the rest of this page and continue.
If you're not in a guided workshop
If you don't have a LaunchDarkly account, sign up for a free trial account, then do the next step.
Once you have signed into your account, you can create a new project for this tutorial.
- Login to your LaunchDarkly account.
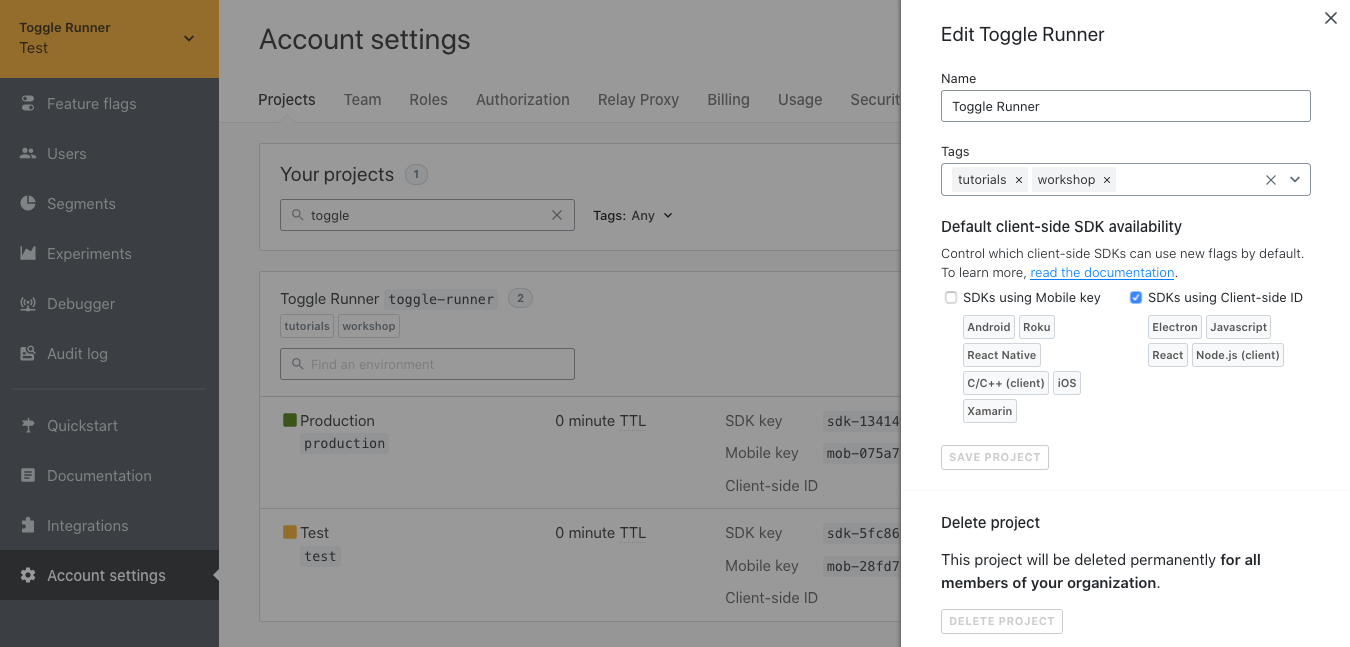
- Click Account settings in the left sidebar.
- Click + Project. The "Create a project" form will appear on the right side of the page.

- Enter
Toggle Runnerin the Name field. - The Key field should already contain
toggle-runner. Leave it as is. - Make sure the SDKs using Client-side ID checkbox is checked, since our project will use both a server-side and client-side SDK.
- Click Save project.
Once you've created the Project, click Next below.