
Implementing Our Feature Flag
Now that we've created our percentage rollout flag, it's time to see it in action. This time, instead of conditionally turning some functionality on or off, we'll use our flag to randomize some aspect of the gameplay. Remember, our game is configured using the properties that live inside of the js/config.js file:
export default {
ACCELERATION: 0.001,
BG_CLOUD_SPEED: 0.2,
BOTTOM_PAD: 10,
CLEAR_TIME: 3000,
CLOUD_FREQUENCY: 0.5,
GAMEOVER_CLEAR_TIME: 750,
GAP_COEFFICIENT: 0.6,
GRAVITY: 0.6,
INITIAL_JUMP_VELOCITY: 12,
INVERT_FADE_DURATION: 12000,
INVERT_DISTANCE: 700,
MAX_BLINK_COUNT: 3,
MAX_CLOUDS: 6,
MAX_OBSTACLE_LENGTH: 3,
MAX_OBSTACLE_DUPLICATION: 2,
MAX_SPEED: 13,
MIN_JUMP_HEIGHT: 35,
MOBILE_SPEED_COEFFICIENT: 1.2,
RESOURCE_TEMPLATE_ID: 'audio-resources',
SPEED: 6,
SPEED_DROP_COEFFICIENT: 3
};
We'll be using our runner-speed flag to randomize the speed at which Toggle initially runs. We can do this by changing the value of the SPEED property inside of our config object. We'll use the following setSpeed function to accomplish this change:
function setSpeed() {
  // Update Toggle's speed and console log the value
  config.SPEED = ldclient.variation('runner-speed', 6);
  console.log('User key: \x1b[31m%s\x1b[0m, Speed: \x1b[31m%s\x1b[0m', lduser.key, config.SPEED);
}
What this function accomplishes is fairly straightforward. The first line after the function declaration
config.SPEED = ldclient.variation('runner-speed', 6);
sets Toggle's speed equal to the value of our multivariate flag. The second line
console.log('User key: \x1b[31m%s\x1b[0m, Speed: \x1b[31m%s\x1b[0m', lduser.key, config.SPEED);
logs the current user key, as well as the variation. This will be useful information to have when we bucket ourselves into the different variations of the runner-speed flag.
We'll add our setSpeed function directly below the updateUser function at the bottom of js/app.js. It should look like this:
function updateUser() {
  let newKey = window.prompt("Enter a new user key", lduser.key);
  if (newKey !== null && newKey !== "") {
    lduser.key = newKey;
    ldclient.identify(lduser, null);
    console.log('Changed user key: \x1b[31m%s\x1b[0m',  lduser.key);
  }
}

function setSpeed() {
  // Update Toggle's speed and console log the value
  config.SPEED = ldclient.variation('runner-speed', 6);
  console.log('User key: \x1b[31m%s\x1b[0m, Speed: \x1b[31m%s\x1b[0m', lduser.key, config.SPEED);
}

// Call the updateUser() functon when the user clicks on the header
document.getElementById("heading").addEventListener("click", updateUser);
We'll also need to make sure that the setSpeed function gets called inside of the drawGame function for our changes to take effect. We can do that by adding the following line
setSpeed();
to the body of our drawGame function. We'll add it right before our new Runner instance gets created. The drawGame function should now look like this:
function drawGame() {
  // Before we start the game, let's confirm that space mode is enabled for this user.
  // We will use `false` as the fallback value, so that if the client fails
  // to initialize or the flag has not yet been created, the game will use the dinosaur sprite sheet.
  if (ldclient.variation("space-mode", false)) {
    // Change the source URL used for the sprite sheets
    smallSprites.src = "/images/100-percent/100-sprite-space.png";
    largeSprites.src = "/images/200-percent/200-sprite-space.png";
    // Change the game name heading
    heading.innerText = "Toggle Runner";
  }
  else {
    // switch to Dinosaur Mode
    smallSprites.src = "/images/100-percent/100-sprite.png";
    largeSprites.src = "/images/200-percent/200-sprite.png";
    // Change the game name heading
    heading.innerText = "T-Rex Runner";
  }

  //Sets Toggle's Initial Running Speed
  setSpeed();

  if (!Runner.hasOwnProperty("instance_")) {
    const runner = new Runner('.interstitial-wrapper', config);
  }
  Runner.instance_.updateGraphics();
}
Now that we've added our setSpeed function, we'll need to re-run our REPL instance to get the changes to take effect.
You should see some new information in the console area at the bottom right hand corner of your REPL instance:
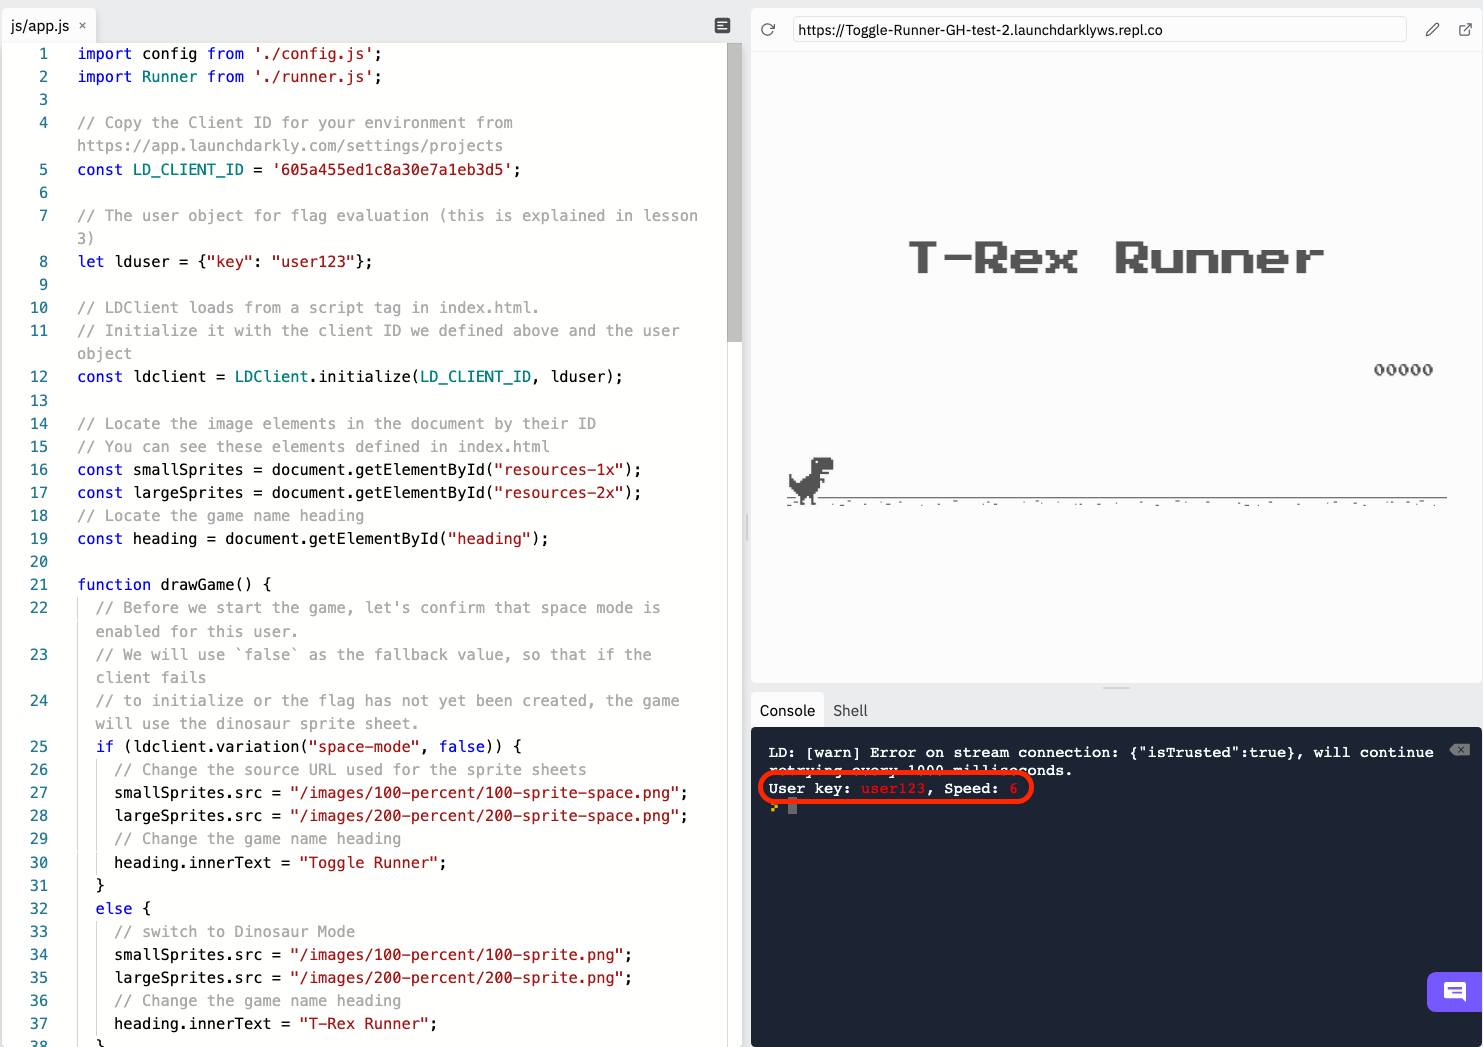
Any time our variation changes, a new console log will be printed that tells us the current variation for the given user key. If you don't see the console log, double check your code has been implemented correctly. Your full js/app.js should look like this:
import config from './config.js';
import Runner from './runner.js';

// Copy the Client ID for your environment from https://app.launchdarkly.com/settings/projects
const LD_CLIENT_ID = '<YOUR CLIENT ID HERE>';

// The user object for flag evaluation (this is explained in lesson 3)
let lduser = {"key": "user123"};

// LDClient loads from a script tag in index.html.
// Initialize it with the client ID we defined above and the user object
const ldclient = LDClient.initialize(LD_CLIENT_ID, lduser);

// Locate the image elements in the document by their ID
// You can see these elements defined in index.html
const smallSprites = document.getElementById("resources-1x");
const largeSprites = document.getElementById("resources-2x");
// Locate the game name heading
const heading = document.getElementById("heading");

function drawGame() {
  // Before we start the game, let's confirm that space mode is enabled for this user.
  // We will use `false` as the fallback value, so that if the client fails
  // to initialize or the flag has not yet been created, the game will use the dinosaur sprite sheet.
  if (ldclient.variation("space-mode", false)) {
    // Change the source URL used for the sprite sheets
    smallSprites.src = "/images/100-percent/100-sprite-space.png";
    largeSprites.src = "/images/200-percent/200-sprite-space.png";
    // Change the game name heading
    heading.innerText = "Toggle Runner";
  }
  else {
    // switch to Dinosaur Mode
    smallSprites.src = "/images/100-percent/100-sprite.png";
    largeSprites.src = "/images/200-percent/200-sprite.png";
    // Change the game name heading
    heading.innerText = "T-Rex Runner";
  }

  setSpeed();

  if (!Runner.hasOwnProperty("instance_")) {
    const runner = new Runner('.interstitial-wrapper', config);
  }
  Runner.instance_.updateGraphics();
}

ldclient.on('ready', drawGame);
ldclient.on("change", drawGame);

// This `updateUser()` function ask the user for a new key,
// then changes the user object.
function updateUser() {
  let newKey = window.prompt("Enter a new user key", lduser.key);
  if (newKey !== null && newKey !== "") {
    lduser.key = newKey;
    ldclient.identify(lduser, null);
    //console.log('Changed user key: \x1b[31m%s\x1b[0m',  lduser.key);
  }
}

function setSpeed() {
  // Update Toggle's speed and console log the value
  config.SPEED = ldclient.variation('runner-speed', 6);
  console.log('User key: \x1b[31m%s\x1b[0m, Speed: \x1b[31m%s\x1b[0m', lduser.key, config.SPEED);
}

// Call the updateUser() functon when the user clicks on the header
document.getElementById("heading").addEventListener("click", updateUser);
Now that our runner-speed flag is implemented, you may be wondering how to receive a different variation. If you were to try re-running your REPL instance right now, you would see that your variation remains the same no matter how many times you click the Run button. Continue to the next lesson to learn how to change the variation.